From junk to coin cabinet, redux
My second experiment in turning old junk into a coin storage unit that is attractive and functional, without spending a ton of dollars. It was kind of depressing to outgrow my first cabinet so soon. I'd originally designed it so that I could "easily" add new trays if I needed more space, but, when push came to shove, I didn't want to open that project back up again and risk screwing it up. Luckily, my supply of junk on-hand is apparently inexhaustible…
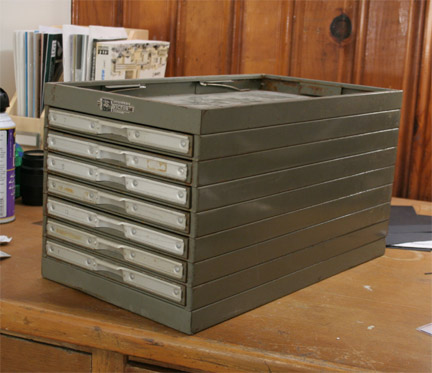
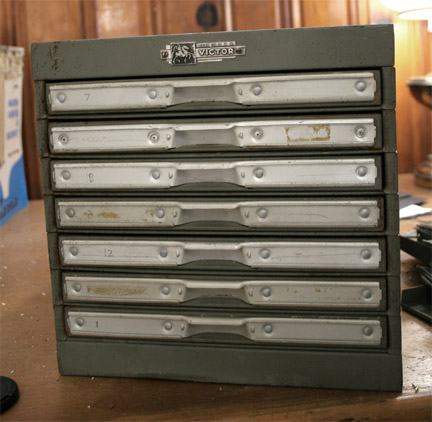
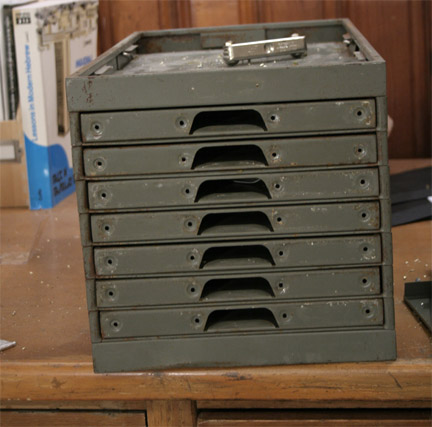
I'd stumbled on this old metal cabinet at a coin show in West Haven. Pretty ugly, but built like a tank. All-steel construction with baked-on enamel paint. They don't make them like this anymore, whatever "this" actually is… Ugly face, but good bones. |
 |
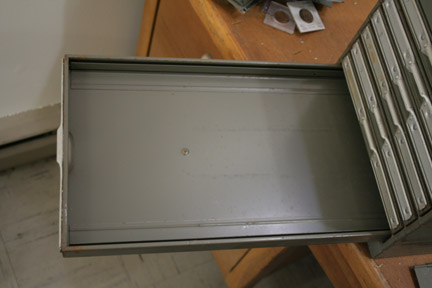
The trays certainly look like they'd be great for displaying coins… |
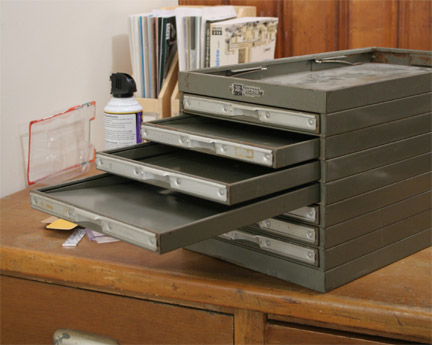 |
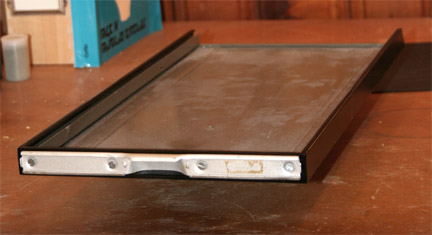
…except for these odd metal flaps that are riveted in place, front and back. What on earth could this have been used for? You certainly can't store coins in it like this. Allen Berman offered it to me for $5. Sold! I'll figure out what to do with it later… |
 |
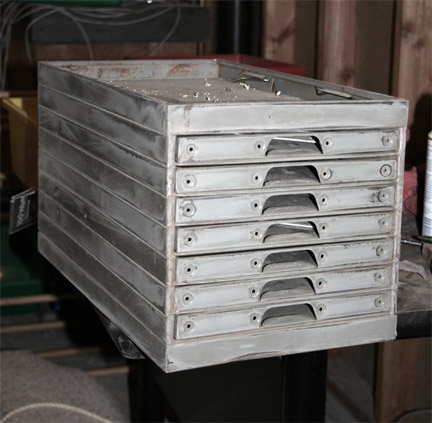
It sat in my basement for a couple of years, until I really started running out of space in Cabinet #1 and was getting desperate. I resolved to make this work. |
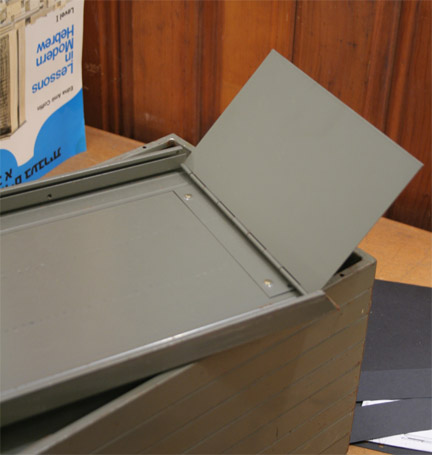 |
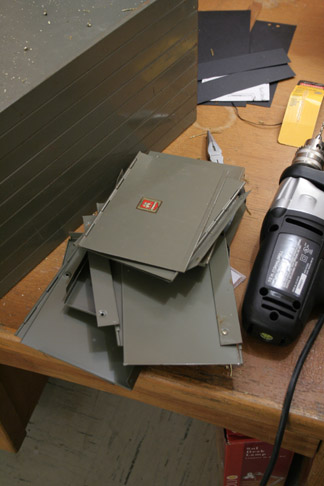
The hard part was getting rid of those danged metal plates, but some quality time with my power drill took care of that. I splurged for a good titanium metal-cutting bit and just drilled out the rivets one by one. |
 |
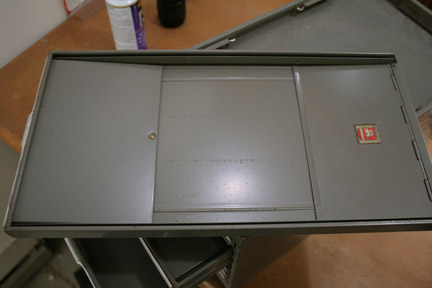
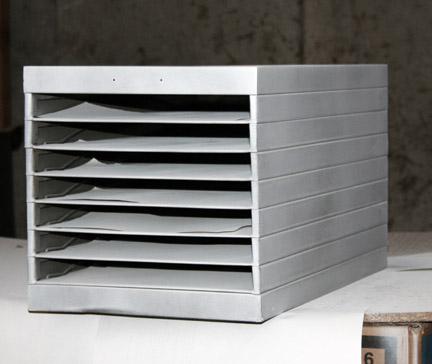
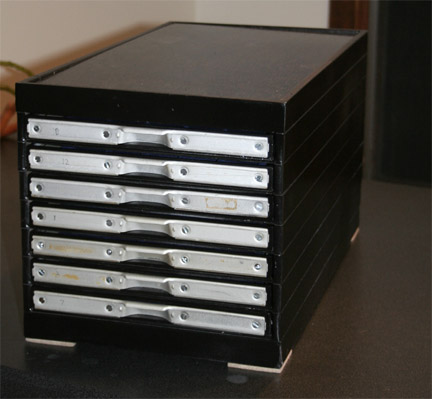
Now, that's more like it! Presumably these were used to store papers of some kind, because the interior dimensions of each drawer are a very convenient 8.5×17 inches. With no internal obstructions, this is now a very usable space. |
 |
The front of each drawer had these ugly plates, also held in place with metal rivets. There's no way I can paint the drawers with these plates in place, so those rivets need to go also. |
 |
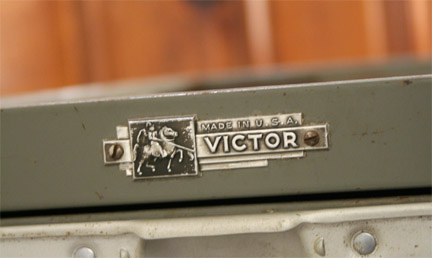
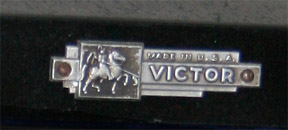
Can't forget the spiffy name plate with the knight. Carefully remove and save. |
 |
Now we can get to work! |
 |
Sand down the whole thing to get a good paintable surface and smooth down all the rust spots. |
 |
Several coats of good primer follow. Thin coats, sand, repeat… At this point, I'm getting pleased — its character is starting to emerge. |
 |
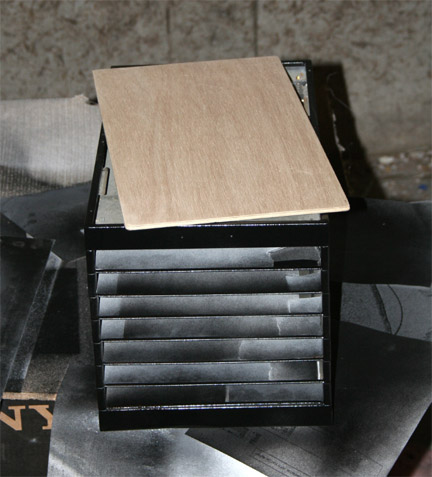
A zillion coats of glossy black enamel paint follow. Thin coat, sand, repeat… Thin coat, sand, repeat… I also rummage around in my garage and find a remnant of 1/4-inch oak-faced plywood left over from an earlier project. I cut and fit a lid, and paint it to match. |
 |
Next, sand and paint all the drawers. I only paint the outside — I want the original baked enamel on the interiors because it is probably more inert and archival than the paint I'm using for the exterior. |
 |
I can refasten the drawer fronts with some small screws I bought to replace the rivets. |
 |
Now, it's starting to look like a coin cabinet! |
 |
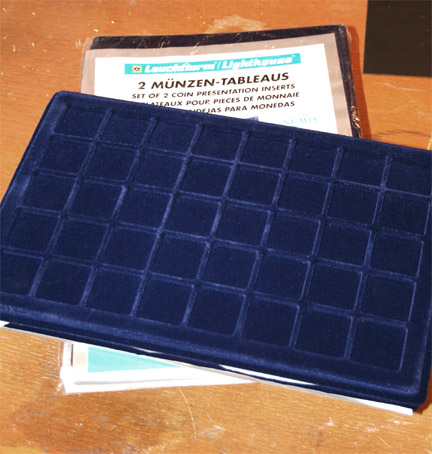
Next, I need to find some trays to fit inside the drawers. What I really want are these Abafil trays from Ed Waddell. The black wood frames would look great in this cabinet, and the size is perfect — exactly 8.5 inches wide — and each tray holds a big 54 coins. Perfect as they are, though, no way can I justify $45 each × 7. Instead, I settle for these Lighthouse trays of flocked plastic. They're just a quarter-inch narrower, but that tiny bit means that instead of 6×9 compartments, they have 5×8, so only 40 coins per tray. Oh well — for $4 each from ebay, they're pretty good value. They'll get the job done. I can always buy better trays later if I want. |
 |
Final details — make up some nice faceplates to insert into the drawer fronts and cover up most of the remaining ugliness… |
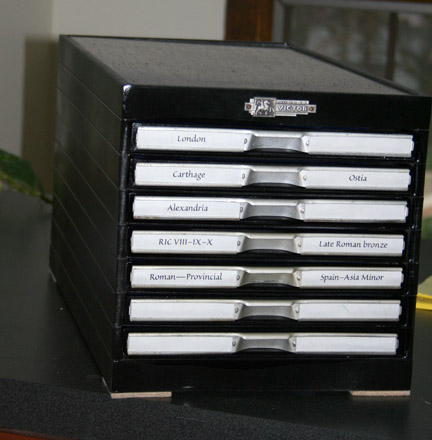 |
…and replace the jaunty — and newly cleaned — nameplate |
 |
All done! And perfectly presentable — I can put this in any room in our house without my wife getting mad. Plus, I now have this great stack of olive-drab metal plates with rivet holes in them, all ready for my next project… Throw them out??? Never!! |
 |